Product characteristics and advantages of Longtian automatic image measuring instrument
Source:Longtian
Time:2019-11-28 03:11:35
Clicks:1611
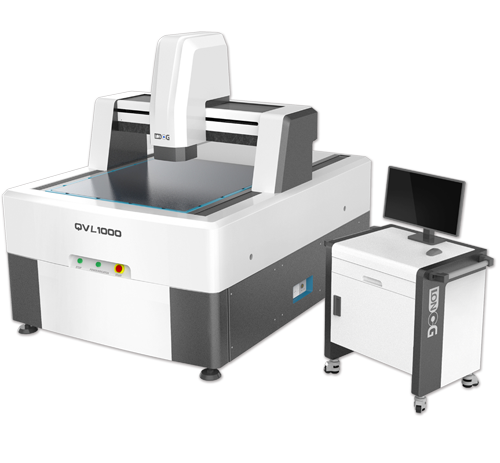
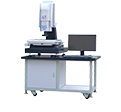
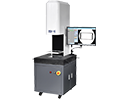
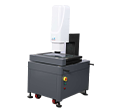
The automatic image measuring instrument is an artificial intelligence modern optical non-contact measuring instrument developed on the basis of the digital image measuring instrument. It inherits the excellent motion accuracy and motion control performance of the digital instrument, and integrates the design spirit of machine vision software. Today's cutting-edge optical size inspection equipment. The automatic image measuring instrument can conveniently and quickly carry out three-dimensional coordinate measurement and SPC result classification, to meet the increasingly prominent requirements of modern manufacturing for size inspection: higher speed, more convenient and more accurate measurement needs, to solve another one in the development of manufacturing Bottleneck technology.
The automatic image measuring instrument is based on artificial intelligence technologies such as automatic edge extraction, automatic matching, automatic focusing, measurement synthesis, and image synthesis based on machine vision. It has "point and where" automatic measurement, CNC position automatic measurement, and automatic learning batch measurement. , Image map target guidance, full-field eagle eye magnification and other excellent functions. At the same time, the auto-focusing process based on machine vision and micrometer precision control can meet the need for auxiliary height measurement under clear contrast (a touch probe can also be added to complete coordinate height measurement). Excellent software performance supporting spatial coordinate rotation, batch measurement can be carried out when the workpiece is placed at will, and large-scale scanning measurement and SPC result classification can also be performed using fixtures.
Full-automatic image measuring instrument is the advanced stage of image measuring technology, which has the characteristics of high intelligence and automation. Its excellent hardware and software performance makes coordinate size measurement convenient and comfortable. It has an automatic learning function based on machine vision and process control. Relying on the high-speed and accurate micrometer-level positioning of digital instruments, the path of the measurement process can be focused, selected Point, function switching, manual correction, lighting matching and other operating processes self-learning and memory. The fully automatic image measuring instrument can easily learn all the actual operation processes of the operator. Combined with its automatic focus and area search, target locking, edge extraction, and fuzzy calculation of point selection to realize artificial intelligence, it can automatically correct the difference and the position of the workpiece. The deviation caused by the difference enables precise point selection with high accuracy repeatability. Therefore, the operator can be relieved from the monotonous operations such as accurate visual alignment of fatigue, frequent point selection, repeated walking, function switching and the increasingly burdensome tasks to be tested, which can increase the efficiency of batch testing by hundreds of times and meet the requirements of industrial sampling and inspection. Need for mass testing.
The latest fully automatic image measuring instrument has three methods of manual measurement, CNC scanning measurement, and automatic learning measurement, and can superimpose the modules of the three methods for composite measurement. It can scan and generate a bird's-eye view image map to achieve the full-screen target traction of "where to go", the measurement results generated graphics are synchronized with the image maps, and the graphics can be clicked to automatically return to the full-screen eagle eye to zoom in. It can correct the contrast imaging error of any measured size through standard measurement and calibration, so as to improve the accuracy of batch measurement of key data. The automatic image measuring instrument has a friendly man-machine interface, supports multiple selection and learning correction, and its excellent high-speed measurement can reach 1000mm / s, coincidence accuracy: ± 1.5μm, linear accuracy: ± (2 + L / 200) μm.
Excellent performance makes it in a variety of precision electronics, wafer technology, cutting tools, plastics, precision parts, springs, stamping parts, connectors, molds, military, two-dimensional copying, drawing, engineering development, hardware and plastics, PCB board, conductive Rubber, powder metallurgy, screws, clock parts, mobile phones, pharmaceutical industry, optical fiber devices, automotive engineering, aerospace, universities, research institutes and other fields have a wide range of applications.
The LT automatic image measuring instrument inherits the following technical features of the LT digital image measuring instrument:
——Integrating CNC rapid measurement, CAD reverse surveying and mapping, and image and shadow management in one. It uses modern optics, computer screen measurement, space geometry calculation and precision motion control and other cutting-edge technologies, and is a highly intelligent device integrating light, machine, electricity and software. It has basic performances such as three-axis numerical control, where to go and where to go, image and shadow synchronization, real-time verification, error correction, random workpiece placement, and rapid CNC measurement.
——With a very high degree of digitization, all operations are completed by the mouse. The soft three-axis micron CNC capability realizes "point where to go", synchronous reading, and man-machine integration; a good man-machine interface organically integrates the cumbersome operation process to get rid of the mechanical limitations of the hand-shake era; It breaks through the limits of accuracy and speed existing in traditional equipment; convenient CNC rapid measurement, establishes CNC coordinate data by means of sample measurement, drawing calculation, CNC data import, etc., the instrument automatically moves to each target point for measurement operation. Ten times the working capacity of manual measuring equipment, the staff is easy and efficient.
——Excellent high-speed performance, based on the unique high-speed displacement sensing technology, its speed within ± 2um measurement accuracy can reach 600mm / S, and its working efficiency is the number of hand-held measuring instruments such as tool microscopes or measuring projectors More than ten times. Displacement drive is 0.1μm, displacement resolution is 0.4μm, coincidence accuracy is ± 2μm, linear accuracy is ± (3 + L / 150) μm, these parameters are better than traditional equipment and similar products.
——With space geometric calculation capability, software technology can be used to complete the complex conversion between the rotation of the space coordinate system and the multi-coordinate system, the measured workpiece can be placed at will, the coordinate origin and reference direction can be established at will, and the measured value can be obtained at the same time Presenting marks, intuitively seeing the coordinate direction and measuring points, makes the most common reference measurement very simple and intuitive, and also makes the product of the mechanical age of the dial plate and the handle together history.
——It has a software platform that supports personalization, and has image management functions such as image storage, editing, and processing. The new surveying and mapping operation can easily depict or import CAD graphics. The measurement module can also be expanded according to customer needs to meet the personalized characteristics and the rapid needs of comprehensive measurement, so that the measurement equipment has a tailor-made software soul

